Anyone can create a WordPress website.
But it's much easier (and faster) when you use a guide that walks you through the entire process step by step.
What you're reading now is the guide I wish I had when building my first WordPress website. Creating that initial site ended up taking me weeks of scouring through blogs, forums, and Q&A websites.
I'll save you that time. In this guide, I'll walk you through the complete process of setting up your own WordPress website in just a few hours. You don't need any technical knowledge to do this.
More specifically, I'm going to show you how to:
- Web hosting setup and domain name registration with Cloud86 (this is where we also host WebsiteGecko)
- Run your site through a secure connection (thanks to an SSL certificate)
- Properly installs WordPress
- Choosing and installing a good WordPress theme yourself (one that's fast, easy to use, and looks beautiful)
- Selects and installs the best plugins for your site (not ones that slow down or ruin your website)
- And more
In short, we don't skip any steps.
Are you ready? Then let's get started.
1. Creating a WordPress website: An overview
First of all, you can do everything in this guide yourself. You won't need to hire any technical help.
We'll also make sure that the costs for your website are kept as low as possible.
What you'll end up with after following this guide is a beautiful, functional website at a budget-friendly price.
First, I'm going to tell you how long it takes to complete this guide, what it will cost you to set up this site, and why I believe WordPress is the best platform for most people to build a website on.
If you want to start building your site right away, you can skip this chapter and begin setting up web hosting and registering a domain name.
How long does it take to complete this WordPress guide?
Completing this entire guide will take you approximately half a day.
Setting up your WordPress site takes no more than 10 minutes. I'm referring to installing WordPress on a quality web host with your own domain name.
Getting comfortable with WordPress – such as adding pages, customizing the design, and creating a menu – will take you several hours to master.
Keep in mind that you don't need to complete this guide all at once. You might choose to finish one chapter per day, for example. Maintain a pace that feels comfortable for you.
I hope the process I've explained here is clear to you. But if you run into any issues along the way, don't worry. The web hosts I recommend offer excellent (and fast) support. Additionally, I'm always available to answer your questions.
You can leave a question for me at the end of this article or reach me by email through our contact page.
How much does it cost to set up a WordPress website?
You don't need to spend anything on your WordPress website itself. The WordPress theme (a tool that determines the appearance and functionality of your site) I recommend is free, and the same goes for the plugins (small programs that you click into your site) I suggest. By the way, I use this theme for all my own websites, including WebsiteGecko.
Your website does need web hosting though. Through Cloud86, you can get hosting starting at €1.95 per month.
Why use WordPress?
The biggest mistake people make when building a website is choosing the wrong platform. Although there are countless ways to get a site onto the world wide web, WordPress.org is the best option in 99% of cases.
Why is that?
WordPress.org offers several massive advantages compared to the alternatives:
- It is free
- It offers virtually complete freedom over your website's design
- You can build almost any type of website with it (blog, business website, ecommerce shop)
- You don't need any technical knowledge for it
- It's fast, well-optimized, and secure
- It's good for SEO
Additionally, more than one third of all websites run on WordPress. This means it has a massive support community. There are countless WordPress developers worldwide who enrich the platform with plugins and other innovations.
2. Setting up WordPress hosting and registering a domain name
Every website needs web hosting and a domain name.
In this chapter, I'm going to show you how to set up web hosting. I'll also show you how to choose and register a domain name.
Although buying a hosting plan and domain name might sound a bit intimidating, there's nothing to worry about. The process I'm going to show you here is very straightforward and doesn't require any technical expertise.
Web hosting and domain name registration
There are literally hundreds of companies where you can purchase a hosting plan and register a domain name.
We're going to use Cloud86. Here's why:
- Cloud86 offers the fastest hosting in Europe. Their WordPress hosting is 100% optimized for WordPress websites, ensuring they run at lightning speed.
- Cloud86 offers exceptional customer service. Their staff will respond to you within just a few minutes by phone or email. Unlike many other services, you don't have to wait for hours or even days to get help.
- They are suitable for both small and very large websites.
- It is easy to use and beginner-friendly.
- Cloud86 is rated almost perfectly by its users (4.9/5 on Google reviews).
This is what we're going to do now:
- We are going to Cloud86 and we're going to choose a hosting plan for our site
- We're going to register a domain name through Cloud86
- We're going to install WordPress in just two clicks using Cloud86
- We finish with a 100% fully functional WordPress website!
Let's get started. Here's the first step you need to take to create a WordPress website:
First of all, click here to go to Cloud86. Now choose one of their hosting plans:
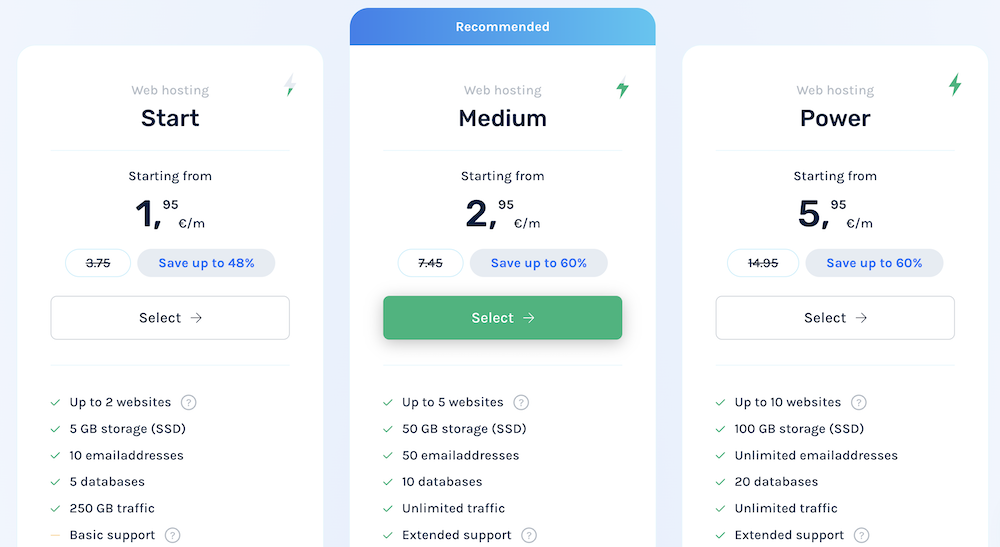
I recommend choosing the Medium Web Hosting plan. With this option, you'll receive more comprehensive support than with the cheapest plan, which is particularly helpful when creating your first website.
You don't need to worry too much about this choice. If necessary, you can upgrade or downgrade your plan at any time.
Now, let's choose a domain name.
If your desired domain name is no longer available, check out our article on how to select a good alternative.
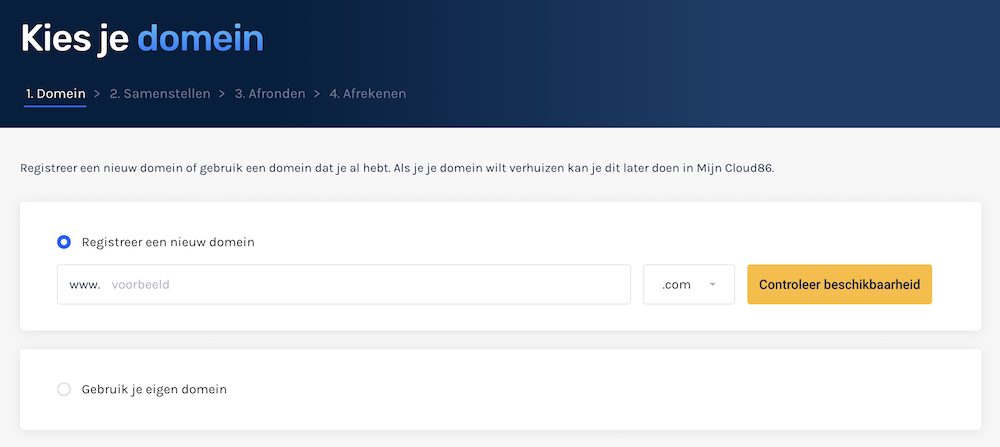
Finally, enter your personal and payment details to complete your purchase.
Congratulations, you are now the proud owner of a piece of internet real estate. 🙂
3. Install WordPress and set up a secure connection
With Cloud86, you can install WordPress in just a few clicks.
We'll also ensure your site runs on a secure connection through an SSL certificate. This prevents hackers from stealing your visitors' data.
In this chapter, I'll show you how to do this.
Installing WordPress
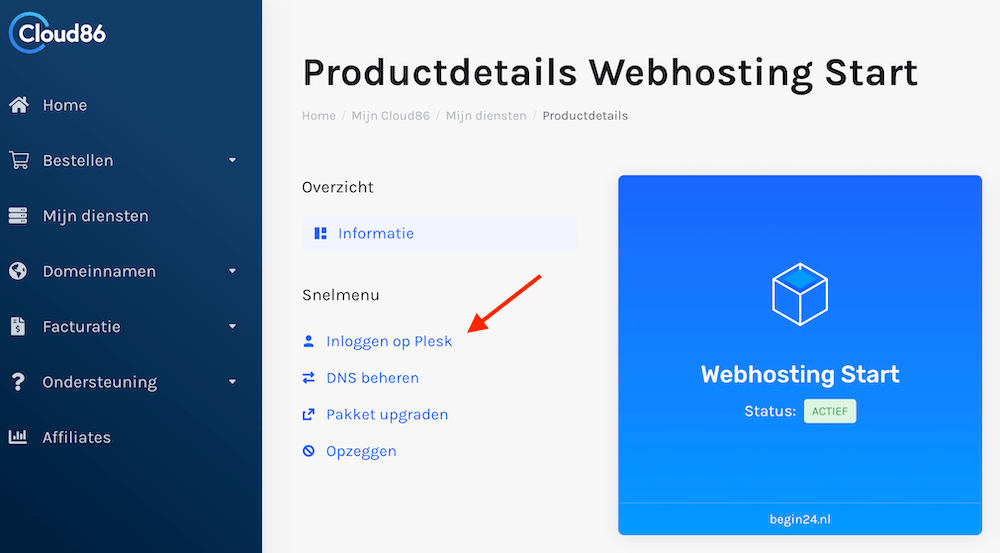
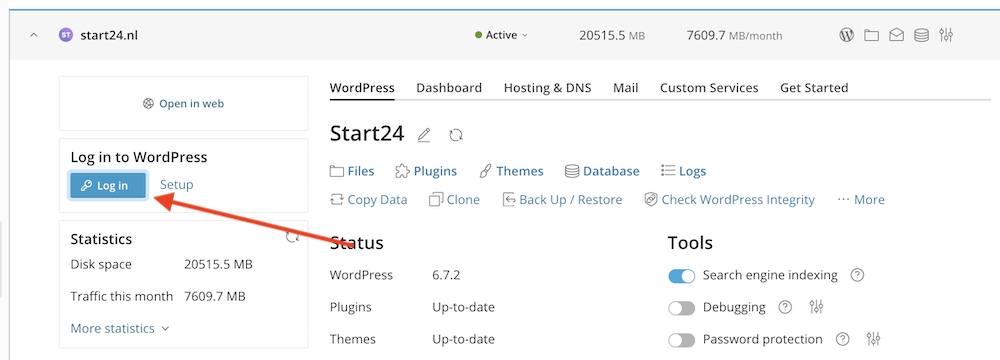
To install WordPress, click on Login to Plesk within the Cloud86 dashboard.
Then click on WordPress and then on Install WordPress.
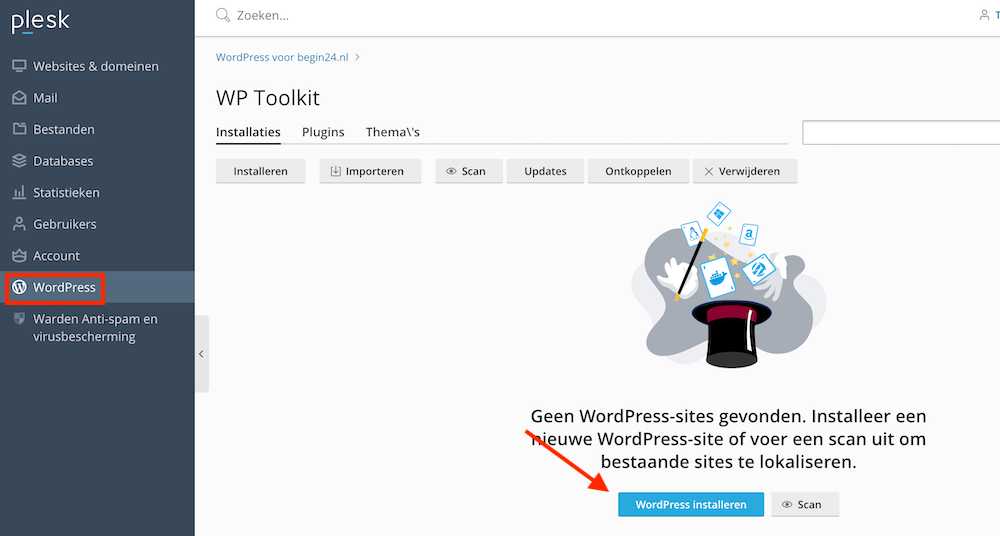
WordPress will be installed in a minute or two.
Installing SSL on your WordPress site
Before we get started with WordPress, we'll first install an SSL certificate on your site for secure connections. This is something every website uses nowadays.
A website is secure when you see a green padlock in your address bar. A secure connection ensures that third parties cannot steal sensitive personal information from your visitors.
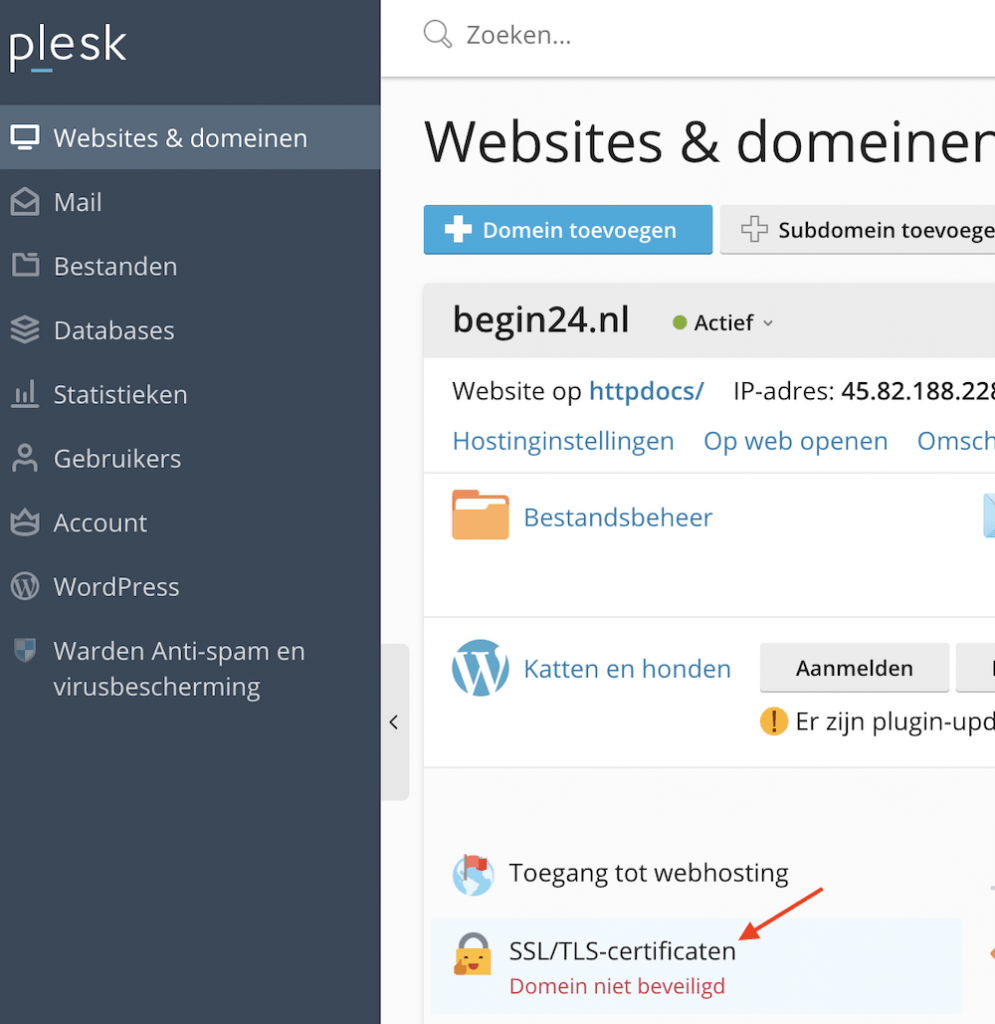
You can easily request an SSL certificate through Cloud86 from the Plesk dashboard:
4. The WordPress interface and useful settings
In this chapter, I'm going to explain how to work with the WordPress dashboard.
I'll also show you some practical settings before you start building your website.
You can access the WordPress dashboard via [your domain name]/wp-admin/.
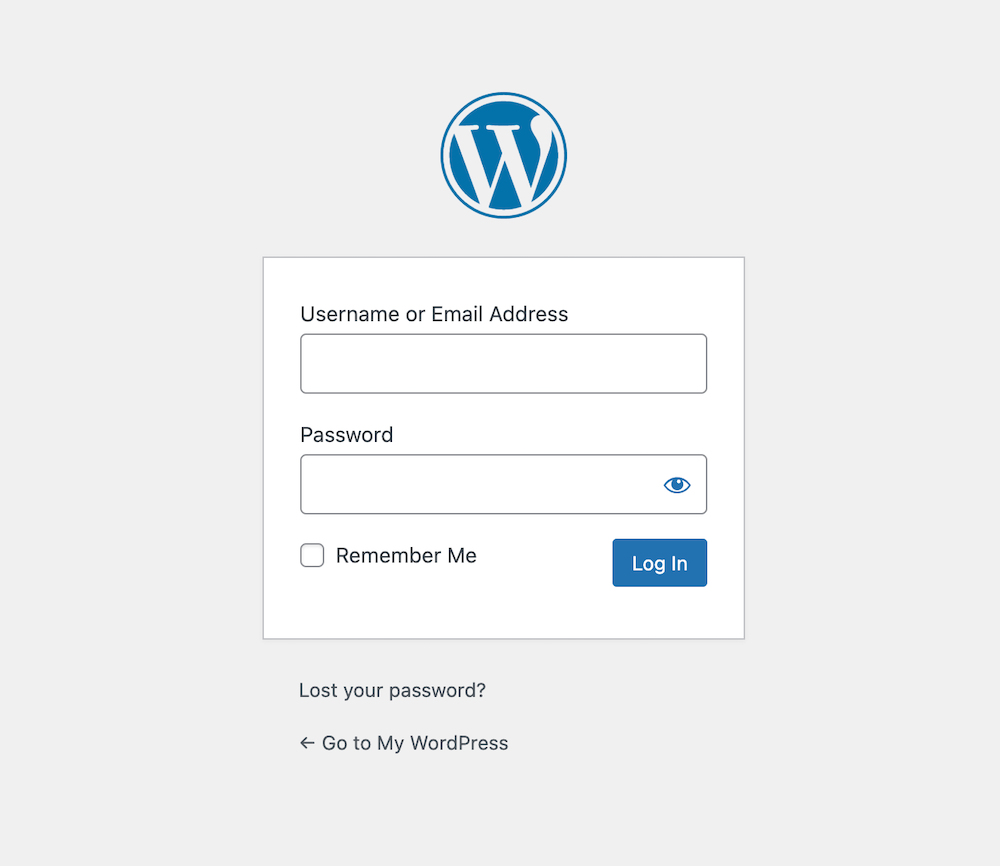
You can also log in to your WordPress dashboard through Plesk.
After you log in, you'll see this screen:
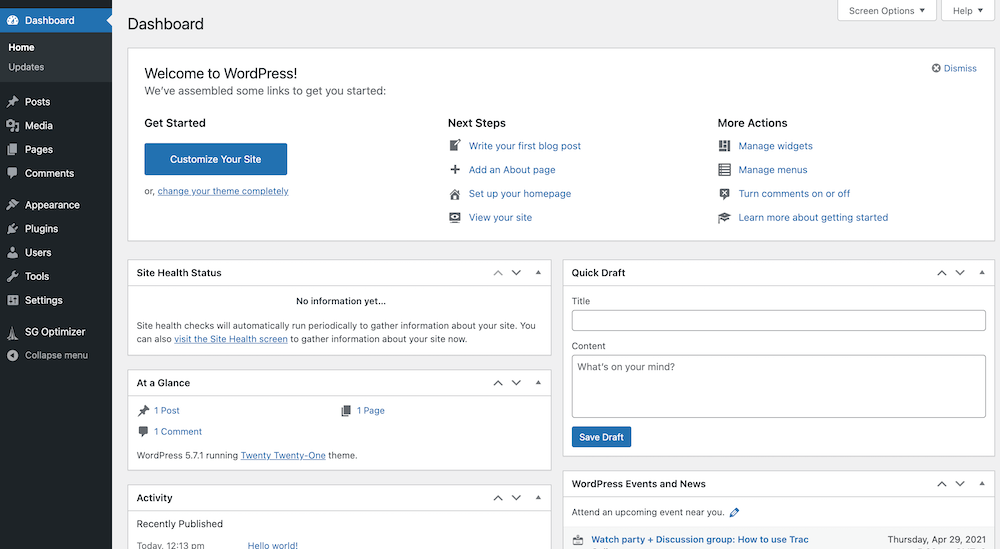
Here you can manage your posts, pages, plugins and all other aspects of your WordPress website.
WordPress settings
Now that we've reached this point, it's a good idea to modify a few settings on your site to improve the user experience for both you and your visitors. I'll show you the settings I use myself and briefly explain what they do.
To access settings, click on Settings » General.
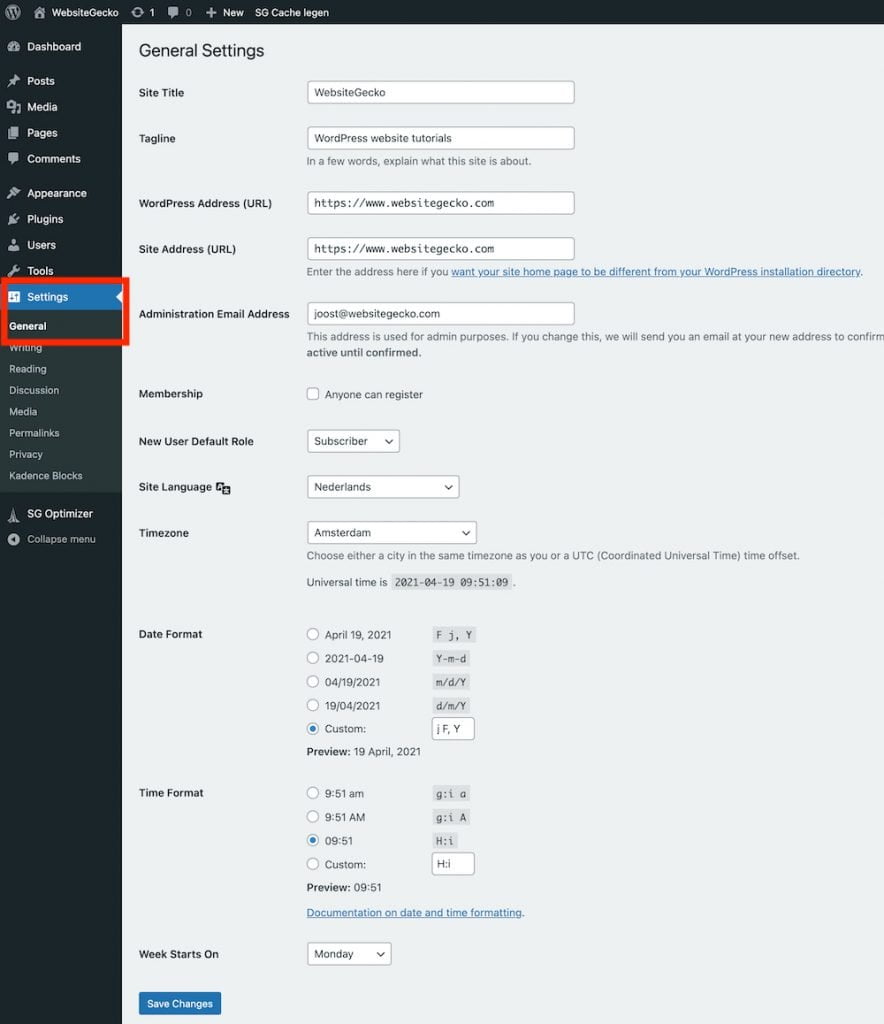
- Site Title. Enter the name of your website here. You'll see this in the top left of your dashboard when you're logged in. It's also automatically included in your article titles by some SEO plugins like Yoast or Rank Math.
- Tagline (Subtitle). Explain in a few words what your site is about
- WordPress Address (URL) & Site Address (URL). You don't need to change anything with these settings. It's better not to touch them at all, because if you enter the wrong address, you could lock yourself out of your own website.
- Administration Email Address. The email address you use to access your WordPress site. You entered this during the WordPress installation process. If you ever want to use a different email address for this purpose, you can change it here.
- Membership (Membership). You don't need to do anything with this
- New User Default Role. You can add other people to your WordPress site. Here you can set how many permissions new users receive by default (you can always change this later). Subscribers have the fewest permissions while Administrators have the most permissions.
- Site language. Set the language for your site here. If you choose Dutch, this ensures that, for example, “Read more” in blog articles automatically changes to “Lees meer.” Your WordPress dashboard will also be in Dutch. If you prefer to keep your dashboard in English while having the rest of the site in Dutch, you can configure this as well. I'll show you how to do this shortly.
- Time zone. Set the time zone for your website here
- Date format. Here you set how your date is displayed. “j” stands for day, “F” for month, and “Y” for year. Personally, I always choose the following format: j, F, Y
When you're done, click the Save Changes button in the bottom left corner.
Under Settings, you'll also find options for Writing, Reading, Permalinks, and more. Personally, I rarely change any of WordPress's default settings. But take some time to browse through all the pages to see if this applies to you as well.
Edit WordPress profile
Via Users » Profile you can customize your own profile. The only options you'll likely want to adjust are the following:
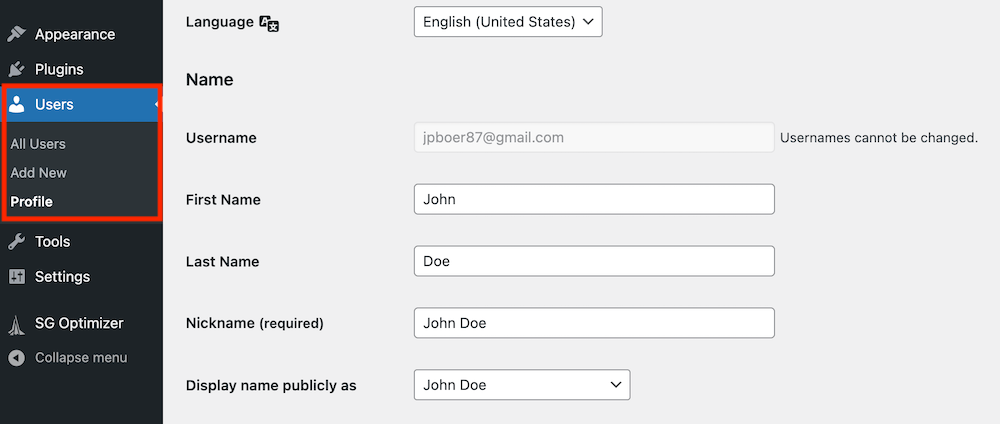
If you prefer to keep your WordPress dashboard in English, you can set this under Language. I personally do this. Many plugins and themes are only available in English. If you pick a different language for your dashboard, you'll end up with a mixture of two languages.
In the name section, you can enter your first and last name. Under Display name publicly as (Screen name), you can choose which author name will appear for any blog articles you post.
In the About Yourself section, you can write a brief biography about yourself and customize your profile picture through Gravatar. Please note that to change your profile picture, you'll need to create a separate WordPress.com account. If you wish, you can set up your profile picture and biography to appear automatically with the posts you publish.
You can also reset your password on this page.
5. Installing WordPress theme: Kadence
Now it's time to install a WordPress theme.
A theme is the heart of your WordPress website. It's a tool that determines and allows you to customize the layout and design of your site. This includes font types, colors, and other design elements. With some WordPress themes, you can also design and build web pages yourself.
In this chapter, I'll show you how to install a theme.
WordPress themes don't directly affect the content of your site. The great thing is that you can install a theme with just a couple of clicks and just as easily replace it with another one. So whatever theme choice you make, you're not stuck with it forever.
There are thousands of themes available for WordPress. As a beginner, choosing the right theme for your site can be overwhelming. Some themes might look beautiful but are poorly coded. Such a theme can make your site slow and hurt your search engine rankings.
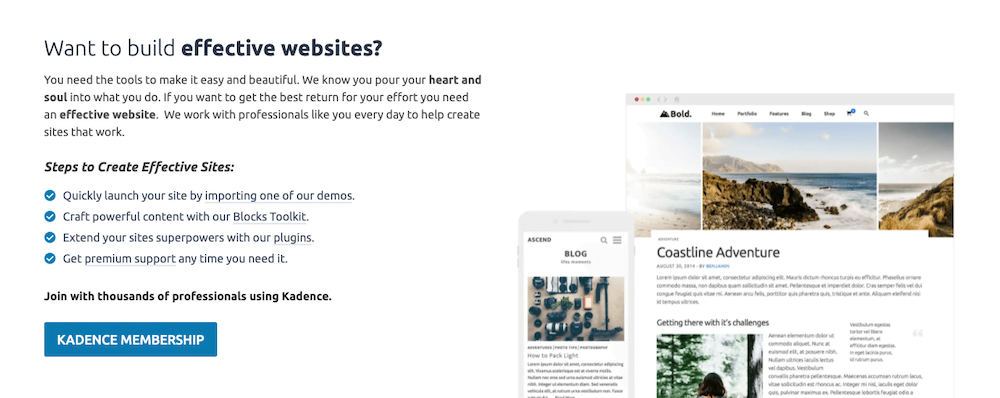
I'll make this search a lot easier (and shorter) for you by recommending the theme I personally use for all my websites: Kadence.
Why Kadence?
There are several reasons why Kadence is an excellent theme for any WordPress site:
- It has a beautiful design. Without having to do anything at all, a Kadence site looks extremely polished. Ideal if design isn't your strongest skill.
- It's easy to use. Kadence is a theme used by many professional WordPress users, but it's also easy for beginners to pick up. Their Starter Templates contribute to this accessibility: beautifully designed, ready-to-use websites where you only need to customize the text.
- It's extremely lightweight and fast. Kadence has an incredibly talented team that prioritizes performance above all else. The result? A site built with Kadence is lightning-fast, creating an excellent user experience for your visitors and a website that ranks higher in Google.
- It's free. Kadence is also available as a paid, premium WordPress theme (Kadence Pro). However, the free version offers more than enough features for most websites. In fact, the free version of Kadence already provides far more capabilities than most paid WordPress themes.
This all makes Kadence, without a doubt, the best WordPress theme in my opinion.
How to install a WordPress theme
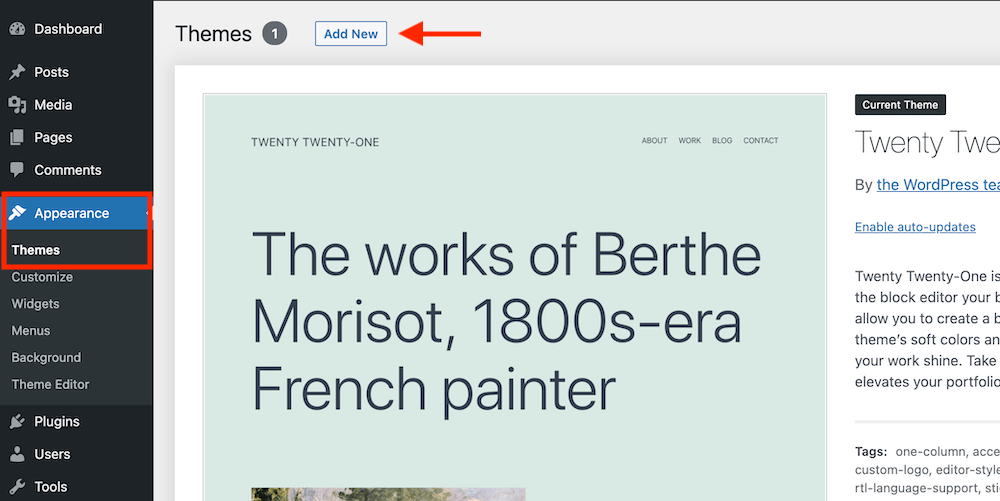
Installing WordPress takes just a few clicks. First, navigate to Appearance » Themes in the WordPress dashboard. Then click on Add New.
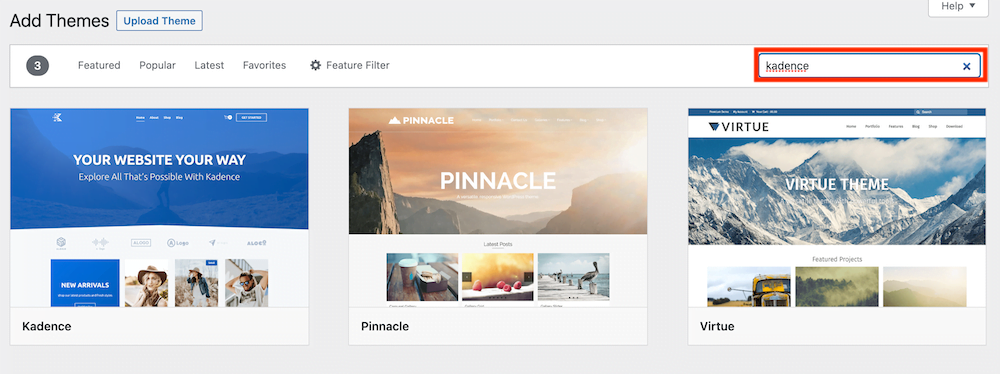
Then type “Kadence” in the search bar.
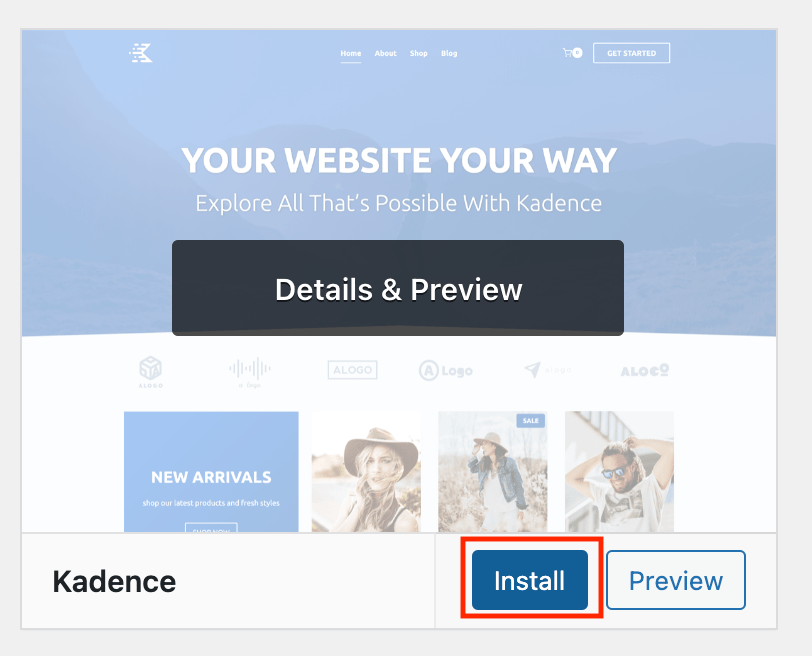
Hover your mouse over Kadence and click the Install button.
Hover over Kadence again with your mouse and click on Activate. This ensures that your site actually uses the theme.
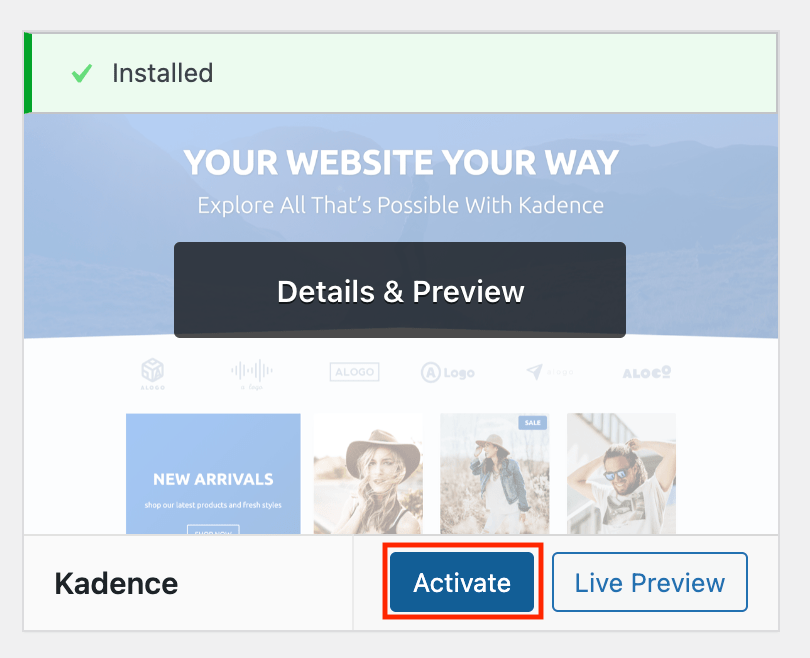
And that's it. This is how you search for, install, and apply a theme to your site.
Choosing a Kadence Starter Template
If you want to get a beautiful, professional-looking website online as quickly as possible, I recommend choosing a Kadence Starter template. Of course, you could also begin with a blank canvas and design a site from scratch yourself. But if you don't have the time or inclination for that, then a Starter Template is ideal.
These Starter Templates are complete websites where you only need to customize the text and images.
To choose a Starter Template, follow these steps. Go to Plugins » Add New Plugins » New plugin). Now type “Kadence AI Starter Templates” in the search bar.
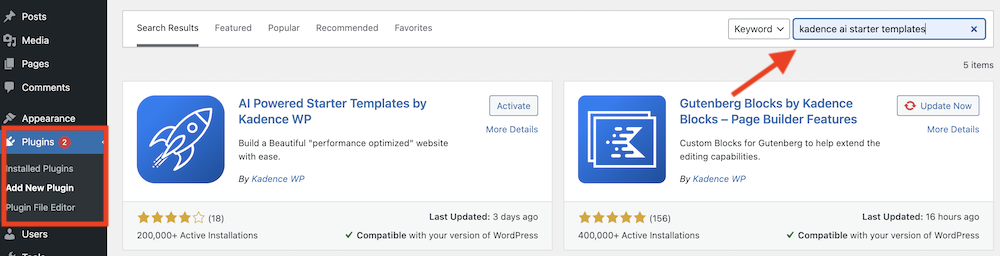
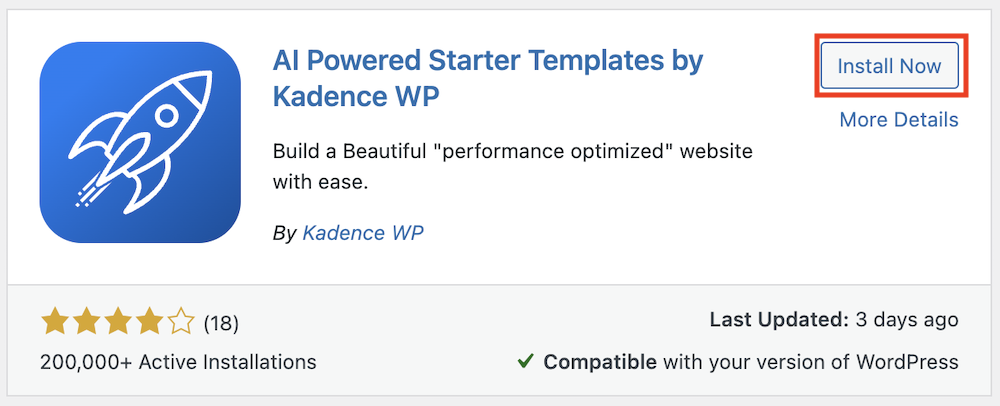
Click now on Install Now.
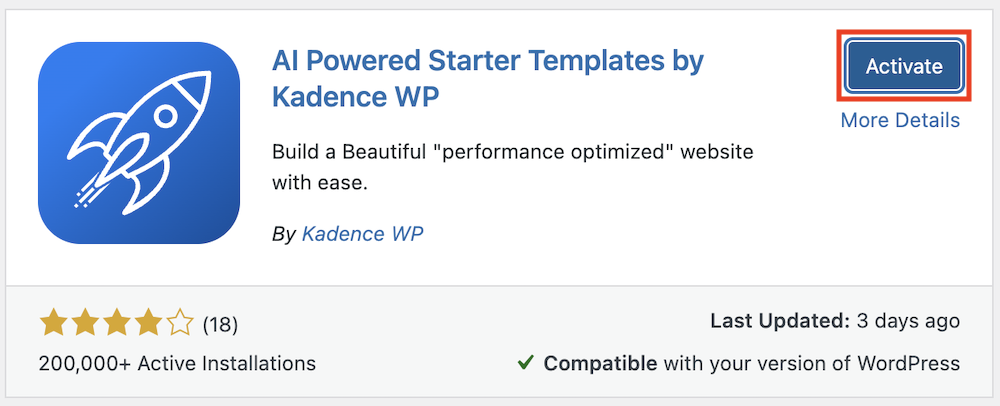
Then click on Activate.
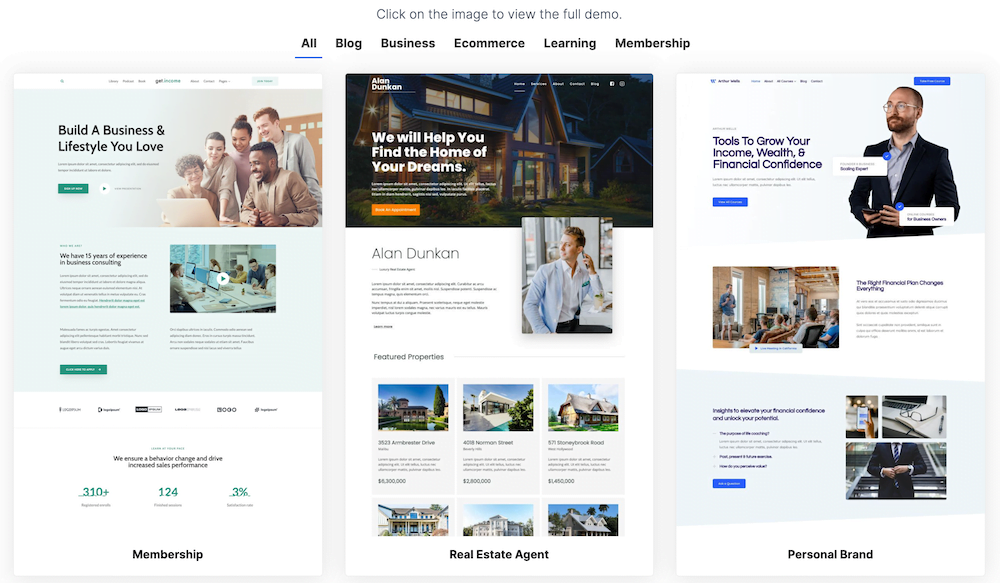
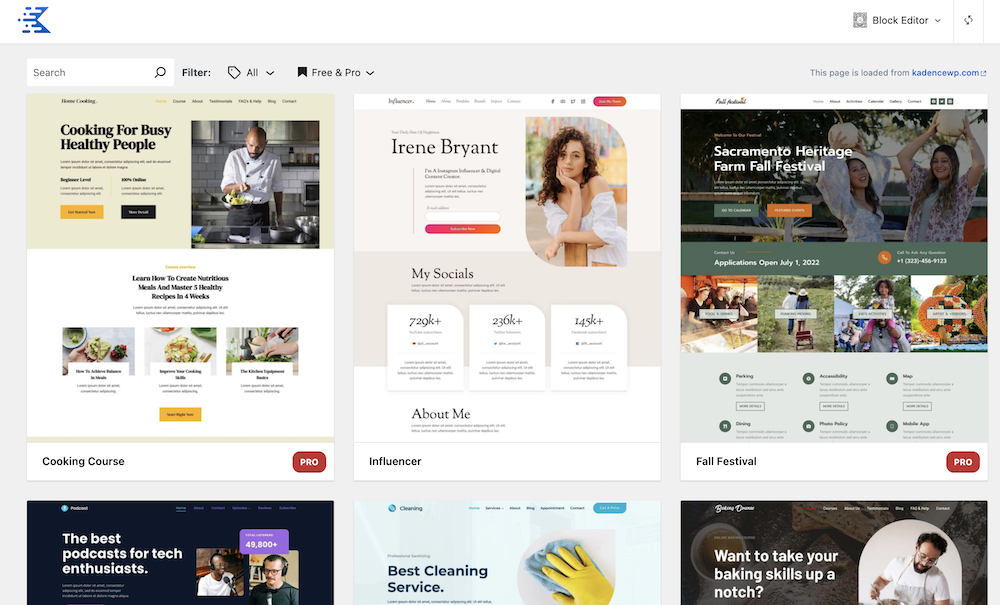
Click now on View Template Library.
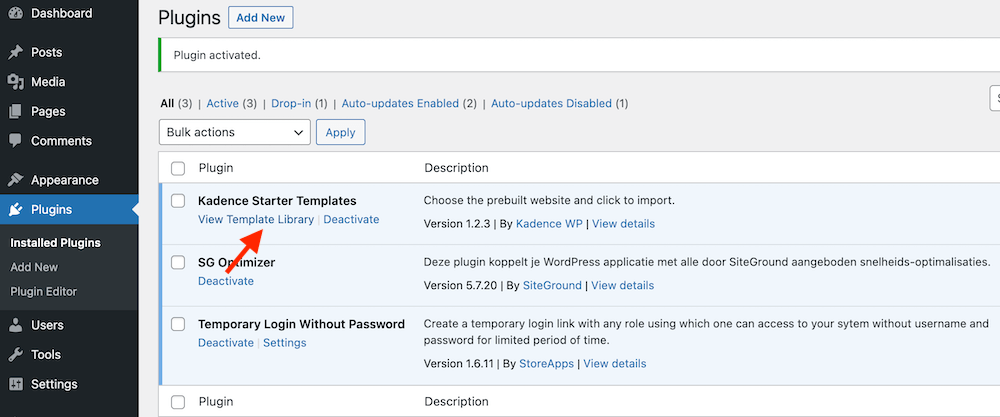
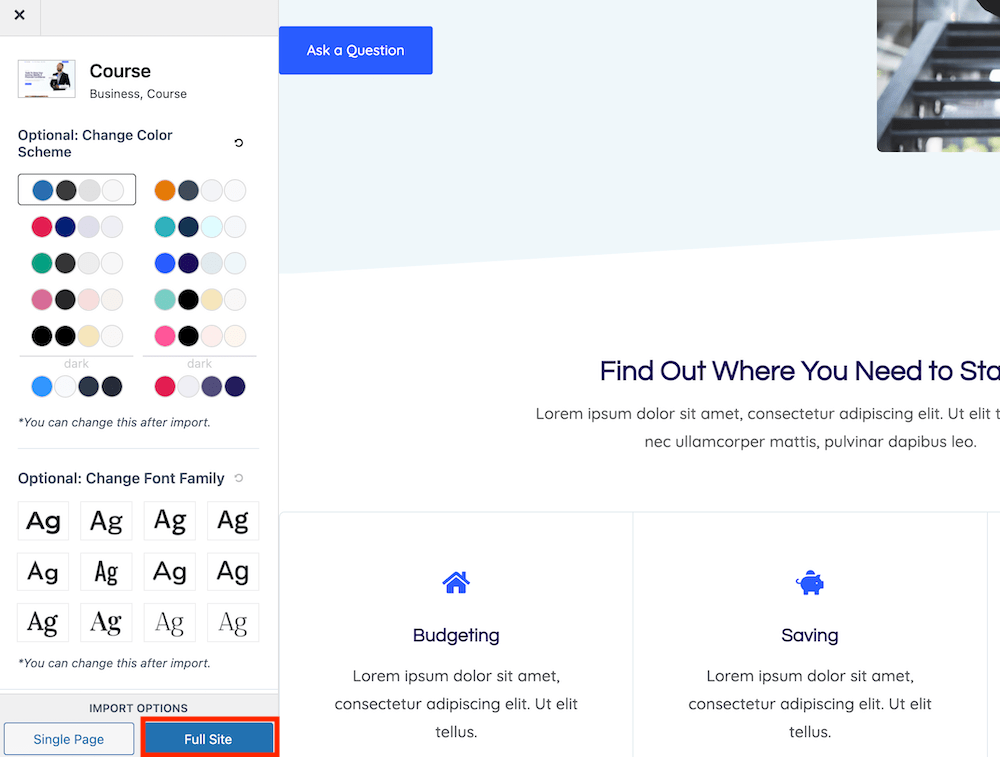
Now you'll see an overview of all available Starter Templates (the ones without the PRO label are free to use). Click on any of the images to view the complete site. Here you can adjust the color scheme and font, and navigate to the different pages.
Once you've found a site that appeals to you, click on Full Site in the bottom left corner of your screen under Import Options.
Click now on Start Importing.
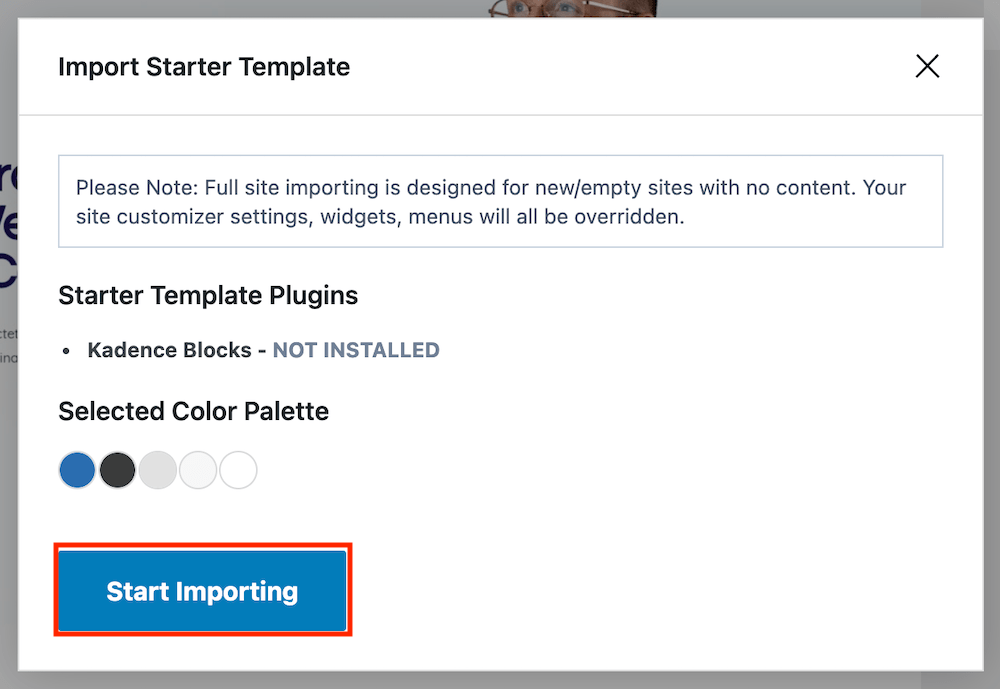
And… that's how simple it is to put a beautiful website online. You can view it by hovering your mouse over the name in the top left of the WordPress dashboard and clicking on “Visit Site”.
In the following chapters, I'll tell you everything about WordPress settings, how to delete, add, and modify pages, how to upload your own logo, and more.
6. Add pages and posts to WordPress
In this chapter, I'm going to show you how to add pages and posts to your website.
But let's first take a look at the difference between the two. They don't actually appear that different within the WordPress dashboard, or even on your site.
What is the difference between pages and posts?
In WordPress, you use pages for elements of your site such as your homepage, about us page, or contact page. These are pages that you want to have complete control over and customize from top to bottom. These pages typically don't include a date or author section.
Blog posts appear in reverse chronological order (newest posts at the top) on your site. These posts will show up on your blog page. You can organize them under specific categories and attach tags to them.
If you're using WordPress as a blog, the majority of your site will consist of posts. This article you're reading right now is a post.
If you're a freelancer using WordPress to promote and describe your services, you'll likely rely more heavily on pages.
Posts fall within a template. For example, if I modify the layout at the top of this post, where you can see my date and name, these changes will be applied to all articles.
A page, on the other hand, is a blank canvas that doesn't restrict you to a template.
Adding, editing, and deleting pages and posts
You can manage your pages by navigating to Pages » All Pages.
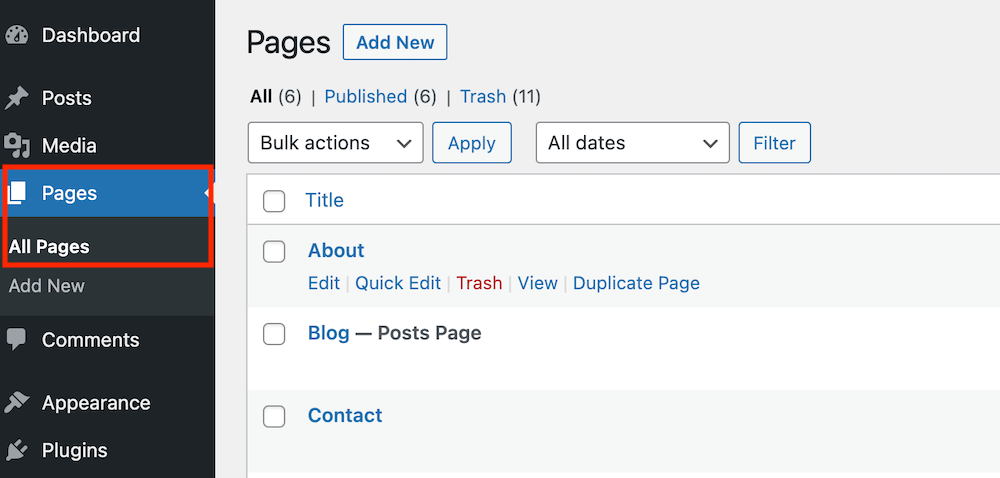
When you click on Add New (New page), you'll create a new page. By hovering your mouse over a page, you can edit it (Edit), delete it (Trash), or view it (Preview).
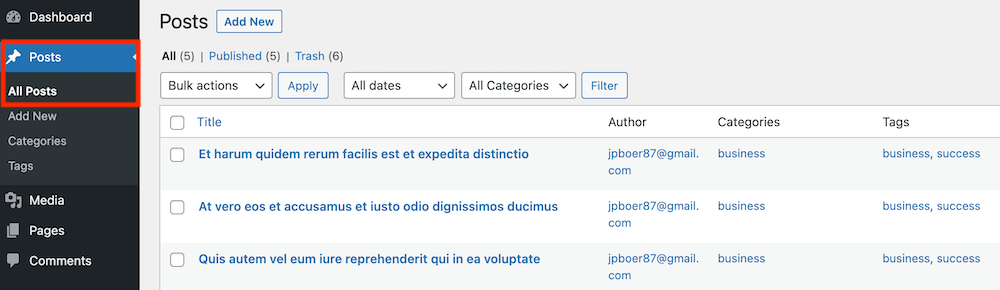
The posts section in the WordPress dashboard looks almost identical. You can navigate to it by clicking on Posts » All Posts.
Creating and editing pages and posts
Now I'm going to briefly explain how to create and edit pages and posts in WordPress.
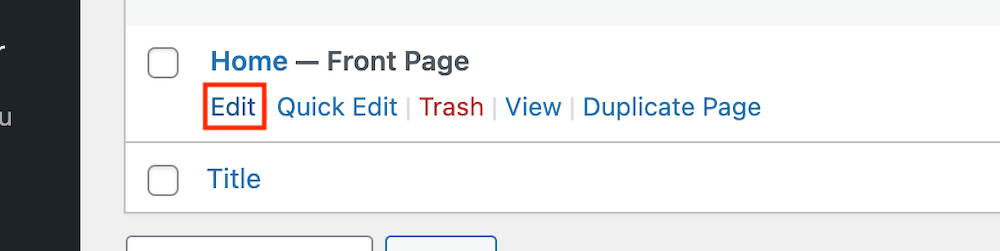
First, click the Edit button beneath the Homepage.
To edit the text, simply click on it and start typing.
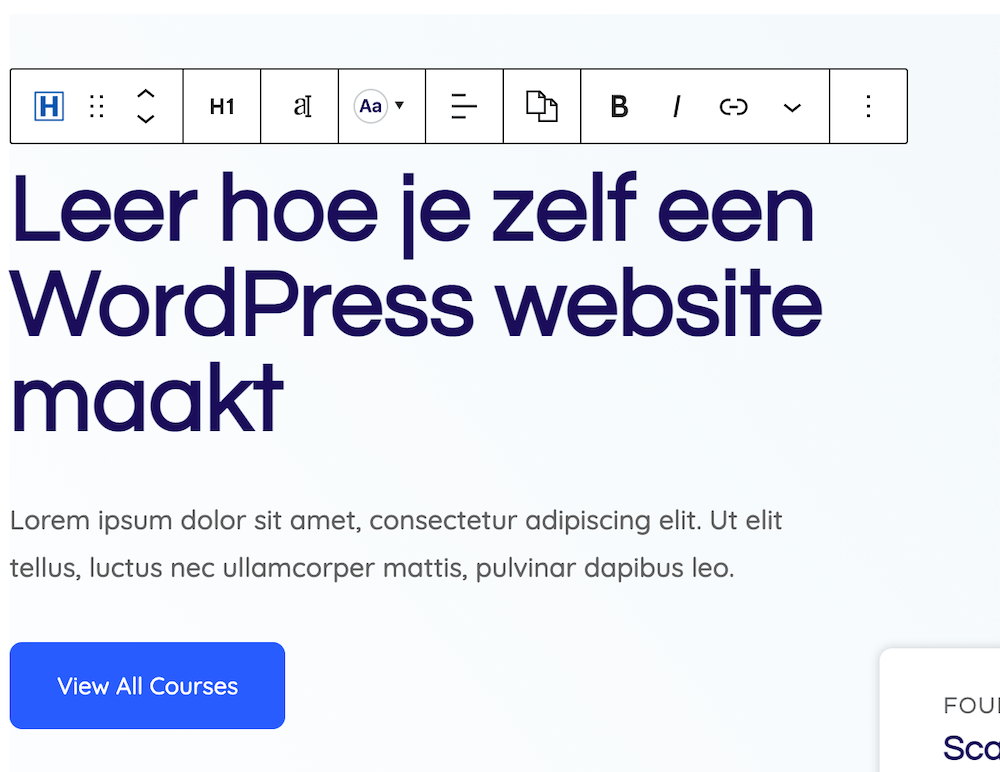
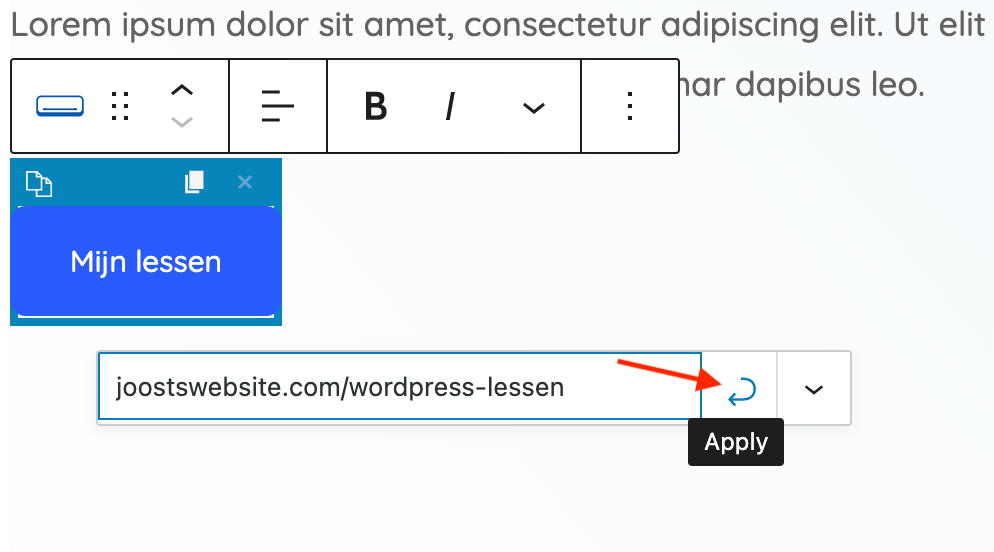
If you want to customize a button, simply click on it, modify the text, and paste in a link to the page where you want to direct your visitor. Then click on Apply.
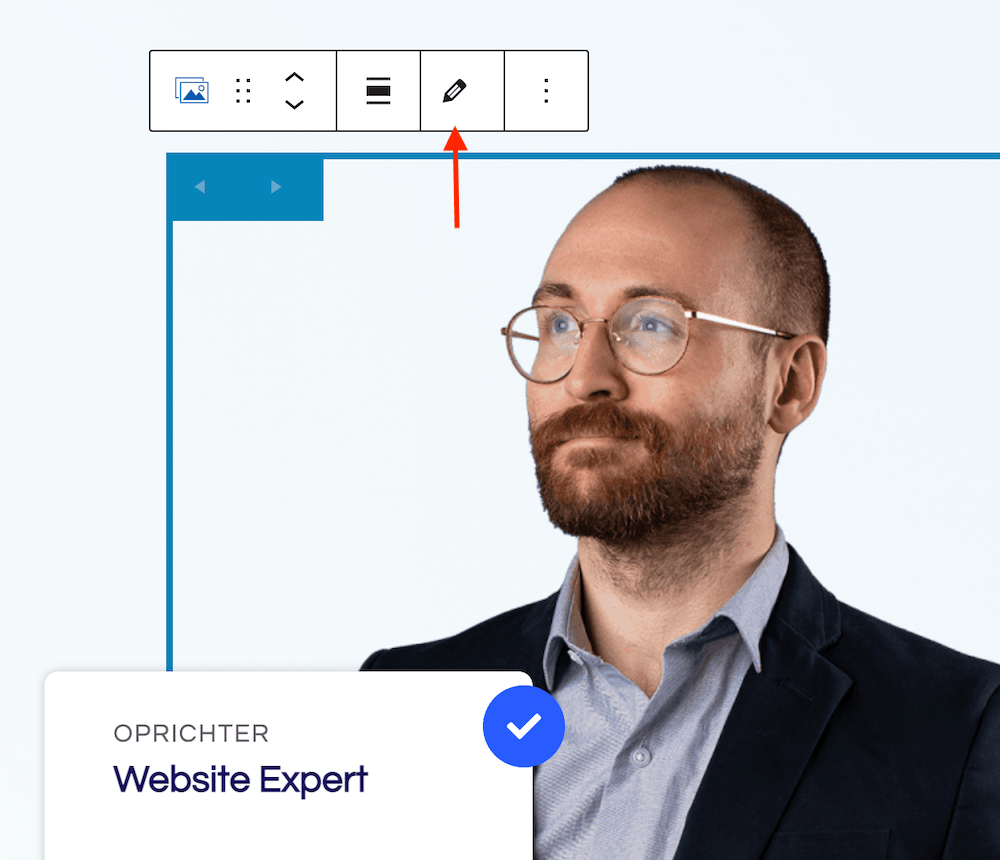
To modify an image, click on the image and then click on the pencil icon.
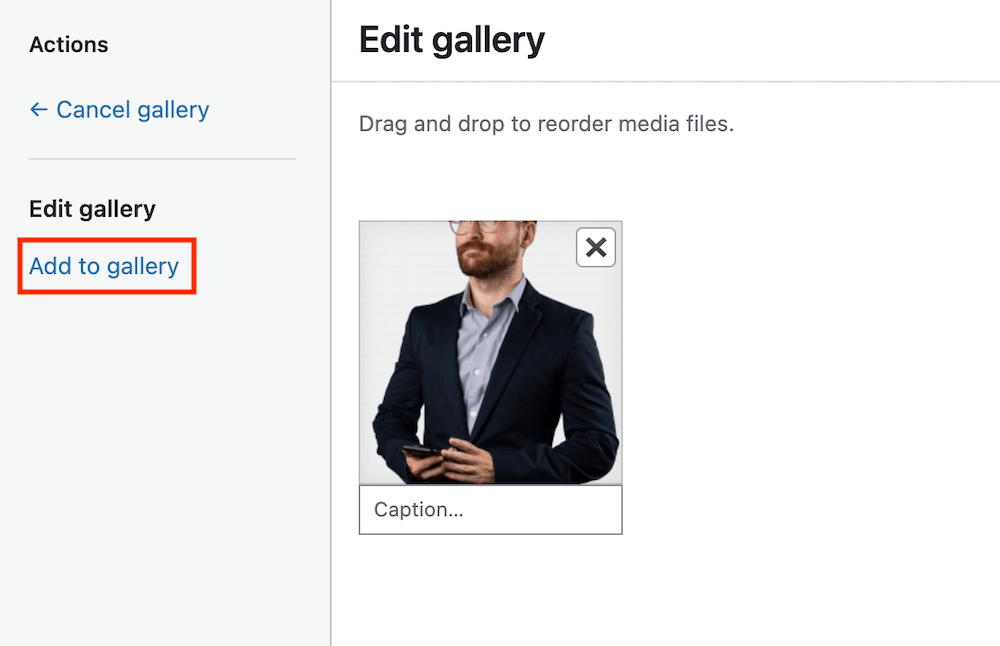
Then click Add to gallery and add the image or images you want to use.
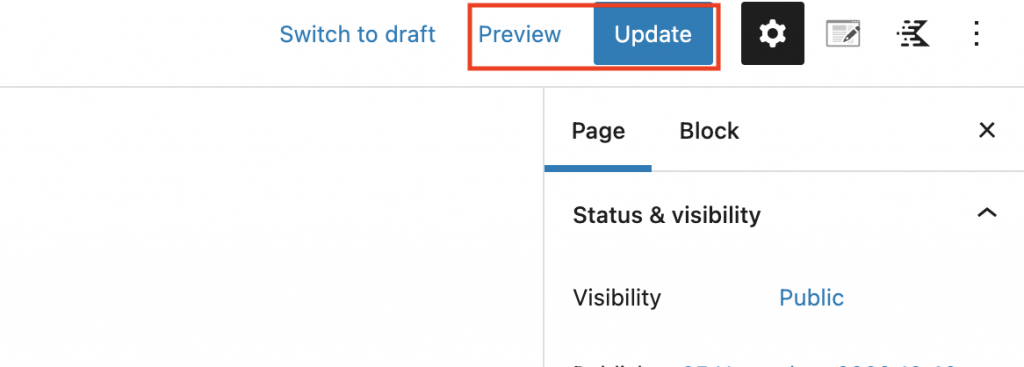
You can then save the page using the Update button in the upper right corner. Using Preview, you can see how the page will appear to your visitors.
With a few of these simple adjustments, this page now looks as follows:
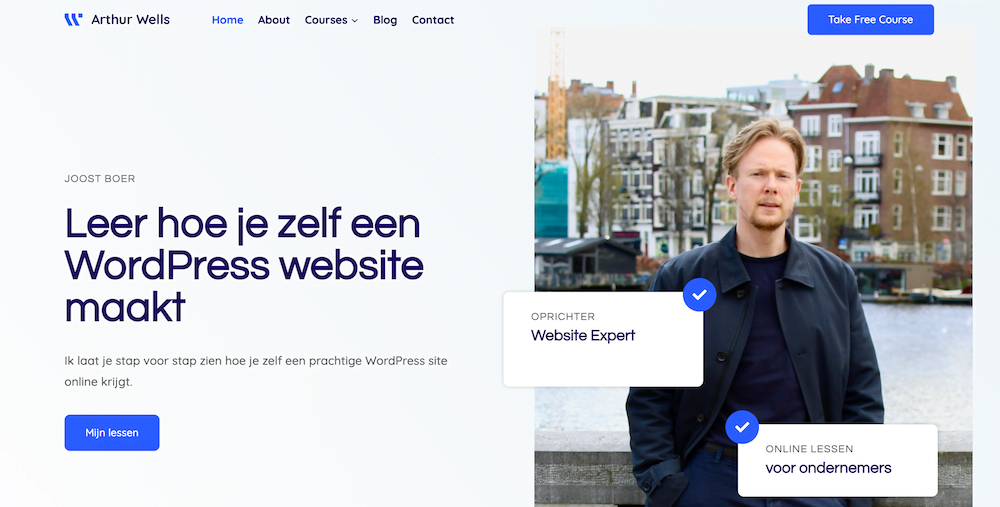
All in all, it took me no more than a few minutes to customize the text, images, and button according to my preferences.
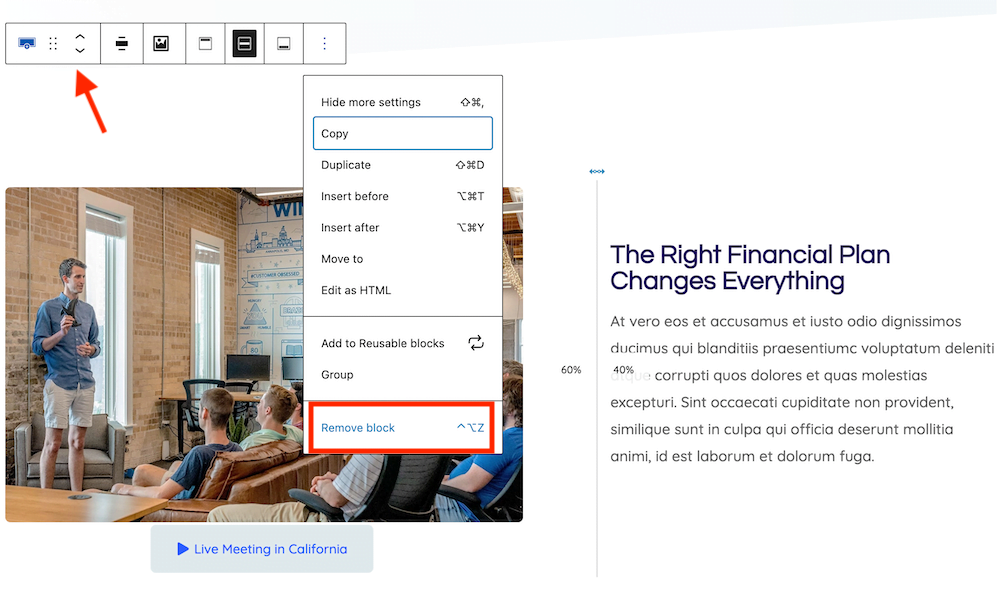
To move elements, you can click the arrows or grab and drag using the 6 dots. If you want to remove parts of the page, select the 3 dots and then choose Remove Block.
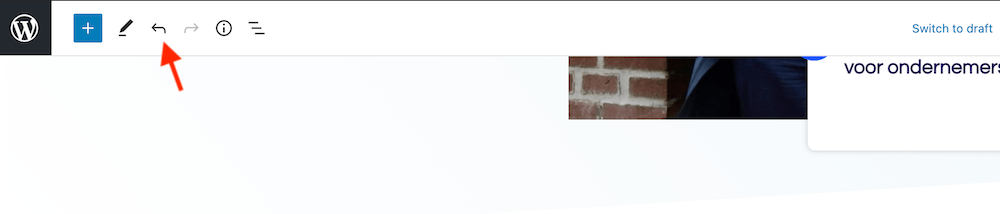
To undo an action, click on the left arrow at the top of the page.
There's much more to show regarding customizing and creating pages. And if you really want to build pages from scratch, it will take you at least a few full days to get the hang of it.
7. WordPress theme customizer
Now let's take a look at the WordPress theme customizer.
With this, you can add a logo to your site (don't worry if you don't have one yet, I'll show you later in this guide how to design a beautiful logo for free), customize your site's color scheme, change the font, and design a navigation menu.
The number of options available in the theme customizer varies depending on the theme. However, if you're using Kadence, you'll notice there are many options to choose from.
Below, I'll show you some of the most important components of the theme customizer.
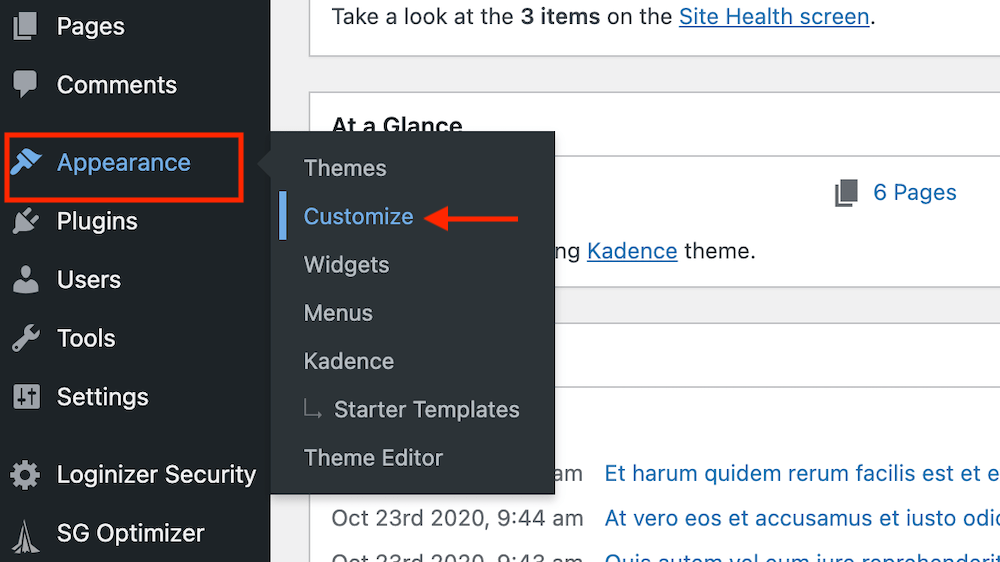
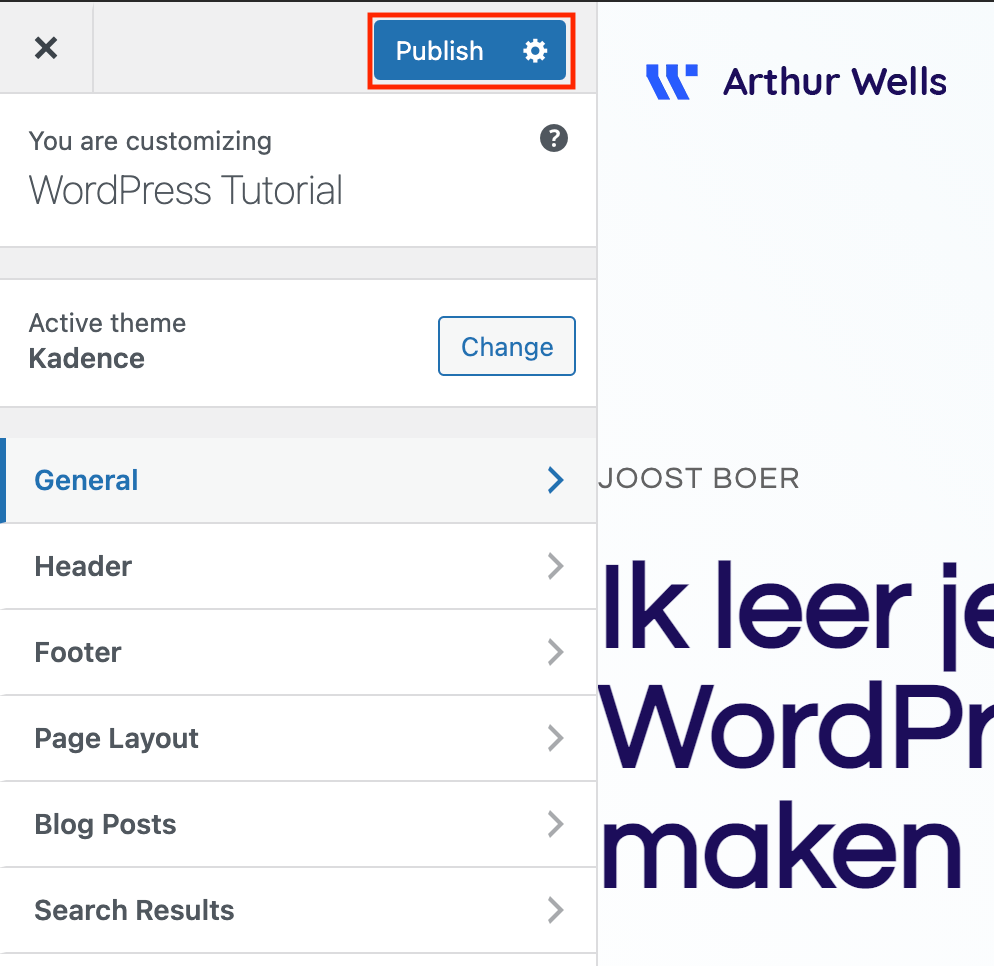
First, navigate to Appearance » Customize. You'll now see a list with General, Header, Footer, etc. (this section is only available in English with the Kadence theme, which is why there are no translations).
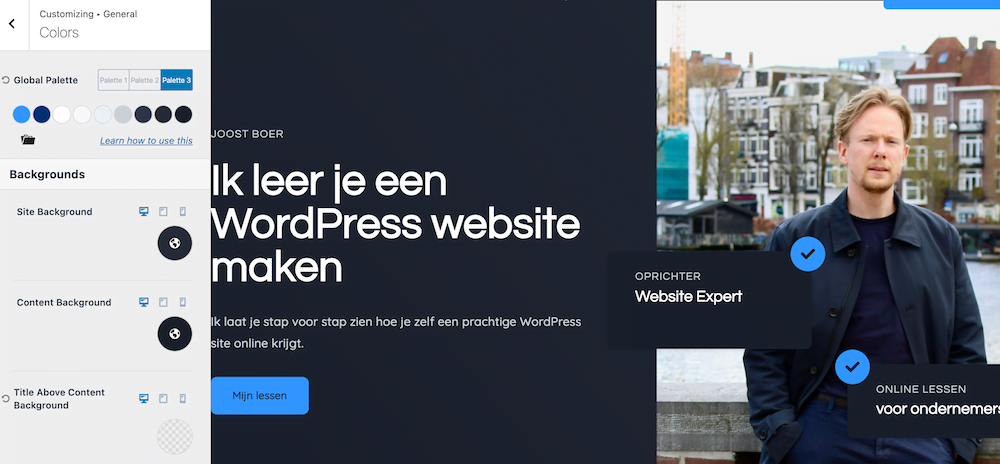
Color settings
Go to General » Colors. Here you'll see the Global Palette which controls the color scheme of your entire website. The convenient thing about this is that you don't have to select colors repeatedly for each element (such as text or buttons) on your site.
The first two colors are accent colors. These stand out and are applied to elements like your buttons and links. You'll see these colors the least on your website. The next 4 colors are contrast colors and are typically used for text. The different shades help create a hierarchy between different types of text. The final three colors are for your site's background. This article from Kadence explores this topic in more depth.
You can adjust the colors by clicking on them and then selecting a color.

The Kadence theme has already prepared several color palettes for you. In addition to the standard light palette, they also offer a dark color palette that you can set up with just one click.
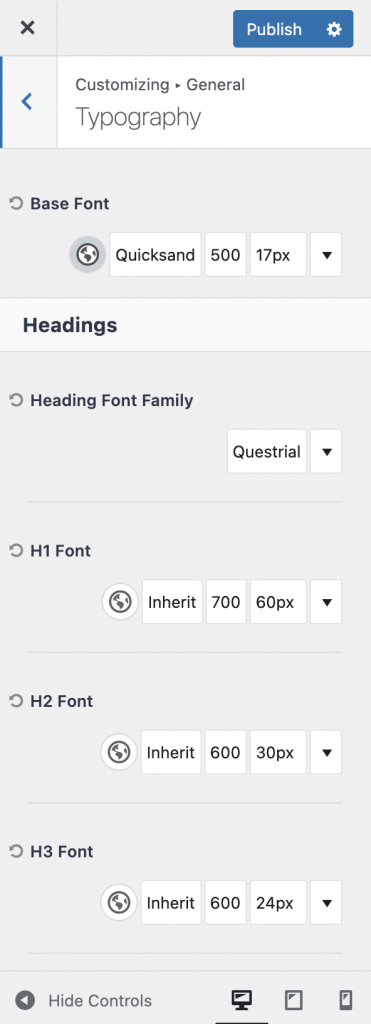
Font settings
To change your site's font, go to General » Typography. Here you'll see several different fonts that you can customize. This is what they mean.
- Base Font. The default text style applied to most text on your site, such as the content of your blog posts
- Heading Font Family. The font for all your different headings
- H1 Font. The title of your page. Every page on your site should have only one H1 title
- H2 Font. The most eye-catching headings on your page
- H3 Font. If you want to organize text under an H2 heading into multiple subheadings, then you should use H3.
- H4 Font. If you want to organize text under an H3 heading into multiple subheadings, then you use H4.
- The above also applies to H5 and H6
If you want to customize these fonts, click on the buttons next to them. This allows you to change the color, font, text style (like italics), and the size (I recommend choosing at least 16 for the Base Font – if you choose less than that, your text will be difficult to read).
Add logo
Go to Site Identity » Site Title and Logo Control.
Click on Change logo. You can then upload your own logo. You can adjust the size of your logo using Logo Max Width.
Customizing WordPress menu
You can customize the navigation menu at the top of your website through Menus in the Theme Customizer. Now click on the top menu that you see.
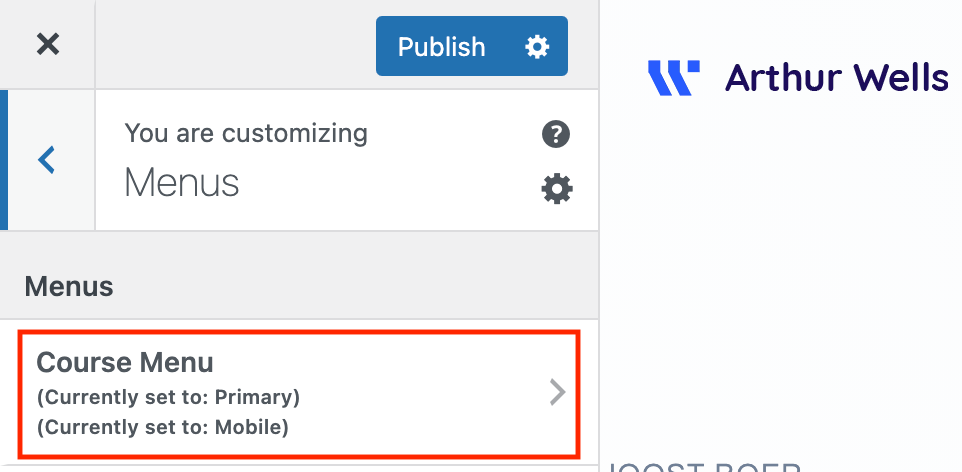
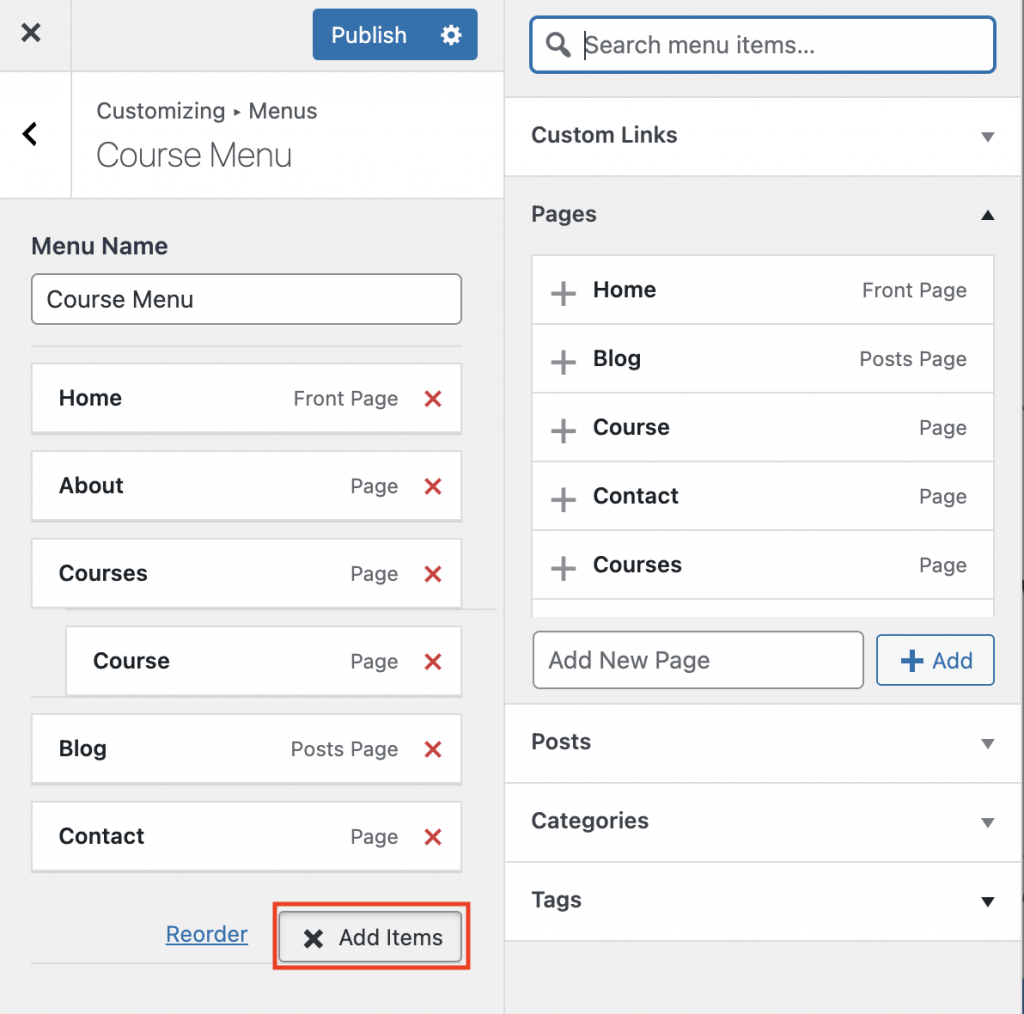
Here you can customize your navigation menu. Adjust the order of items in your menu by dragging and dropping pages.
By clicking on Add Items, you can easily add pages or posts to your navigation menu.
There are many more things you can adjust in the theme customizer. You can use it to give your site a completely unique identity. It's worth exploring the different options and experimenting a bit with the various possibilities. However, Kadence's default settings already provide you with a great design. So you can also simply leave everything as is.
When you've finished making a change in the Theme Customizer, click on Publish. This saves the adjustment you've made and immediately publishes it to your website.
8. Next steps: plugins, images, Google Analytics and more
First of all, it's fantastic that you've made it this far with this guide. In this final chapter, we're going to dot the i's and cross the t's.
We'll look at things like plugins, how to find images, and what the must-have analytical tools are.
We've already covered a tremendous amount about creating a WordPress website. You now know how to set up hosting for your site, register a domain name, and install a WordPress theme. You understand how to add pages and posts, and what the difference is between them. You also know exactly how to personalize your site using the theme customizer.
The hardest part is now behind us. Of course, there's still a lot to learn about creating a WordPress website, but the foundation is in place.
In this chapter, we'll be discussing several things that can take your WordPress website to the next level. We'll cover plugins, how to keep your site up-to-date, and where to find free images. I'll also show you how to design a beautiful logo for your site at no cost.
I'll be discussing Google Analytics and Google Search Console, and sharing links to practical follow-up guides about SEO, copywriting, website design, and how to add an online store to your site.
WordPress plugins
WordPress plugins are small apps that you can click into your website to add extra functionality. Think of plugins that secure your site, transform it into an e-commerce shop, or make your site load faster.
When installing a plugin, keep the following in mind:
- When was this plugin last updated? If it hasn't been updated for more than 5-6 months, there's a high chance that the developer is no longer maintaining it. That's something you definitely want to avoid.
- What do the reviews say? A lot of low ratings are an obvious red flag. Choose plugins that have predominantly satisfied users.
I'm going to show you how to install a plugin and which plugins I personally use for my websites.
How to install a plugin
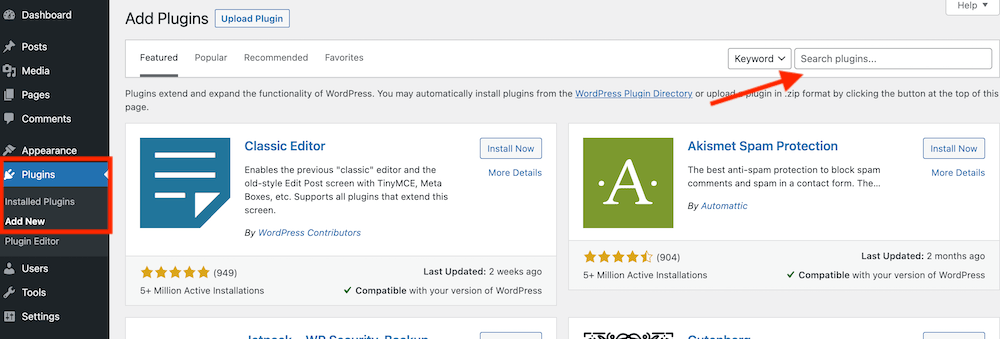
To install a plugin, navigate to Plugins » Add New. You can then upload plugins you've downloaded to your PC using the Upload Plugin button. However, most plugins can be installed directly through WordPress itself. You can do this using the Search plugins function.
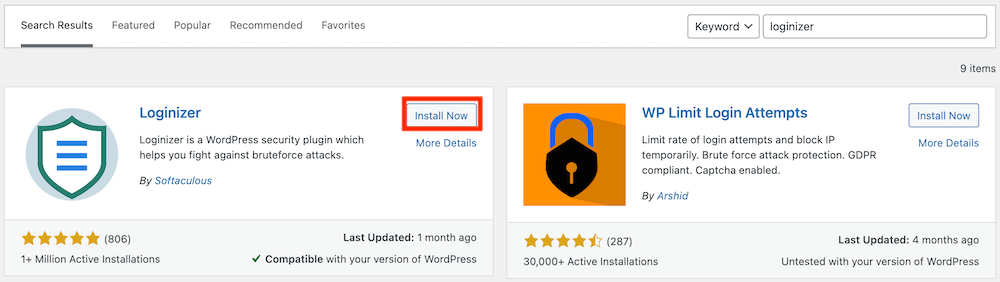
I'll show you exactly how this works by installing a plugin that every website needs: Loginizer. This plugin makes it extremely difficult for hackers to break into your site.
First, type Loginizer in the search bar. Then, click on the Install Now button.
Once the plugin is installed, click Activate to actually use the plugin on your site.

What you're seeing now is the plugin appearing in the left sidebar of the WordPress dashboard.
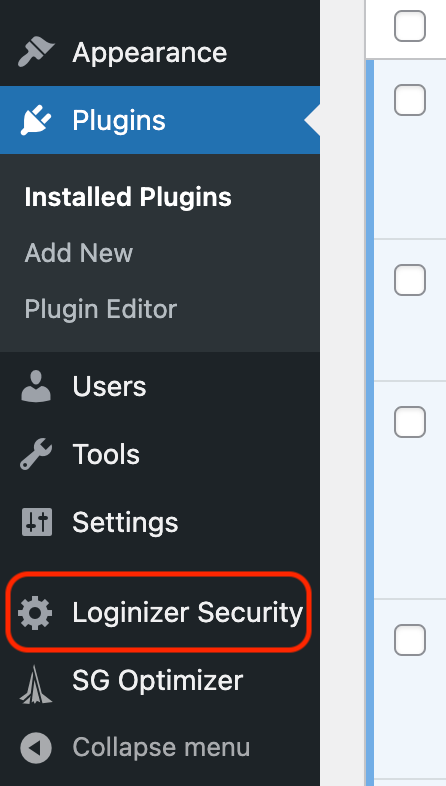
Click on the plugin name to adjust its settings.
Plugins I use myself
Below is an overview of the plugins I use for the majority of my websites:
- Kadence Blocks (free). This free plugin allows you to build virtually any webpage you can imagine. If you've previously installed the Kadence Starter Templates, this plugin is already on your website
- Kadence Blocks – PRO extension and Kadence Pro Premium addon (paid). The paid version of Kadence Blocks and the Kadence theme. Offers additional features compared to the free version
- Loginizer (free). This plugin protects you against brute force attacks from hackers by blocking an IP address after a certain number of login attempts.
- Post Duplicator (free). Allows you to copy posts and pages
- Rank Math SEO (free). The best all-in-one SEO plugin available. Includes features that were previously spread across many different SEO tools.
- LiteSpeed Cache (free). A caching plugin that significantly speeds up your site with just a few clicks.
You'll likely need quite a few additional plugins to give your site all the functionality you need. Check out our favorite WordPress plugins organized by different categories.
Keep in mind: the fewer plugins you use, the better. Generally, using more plugins increases the likelihood of problems with your website. Additionally, plugins can make your site heavier and slow it down.
Therefore, only install plugins that you truly need, and remove any plugins you no longer use.
Updates
Due to WordPress's popularity, it has become a prime target for hackers. According to Sucuri, 44% of all successful attacks are caused by outdated WordPress installations. The remainder primarily results from poorly secured plugins or outdated plugin versions.
Fortunately, keeping your WordPress site up-to-date is very simple. Below, I'll show you how to do this for your WordPress installation, your theme, and your plugins.
Keeping WordPress and your theme updated
To keep your WordPress installation and theme up-to-date, navigate to Dashboard » Updates. If either of these needs updating, you'll immediately see a notification in your dashboard.
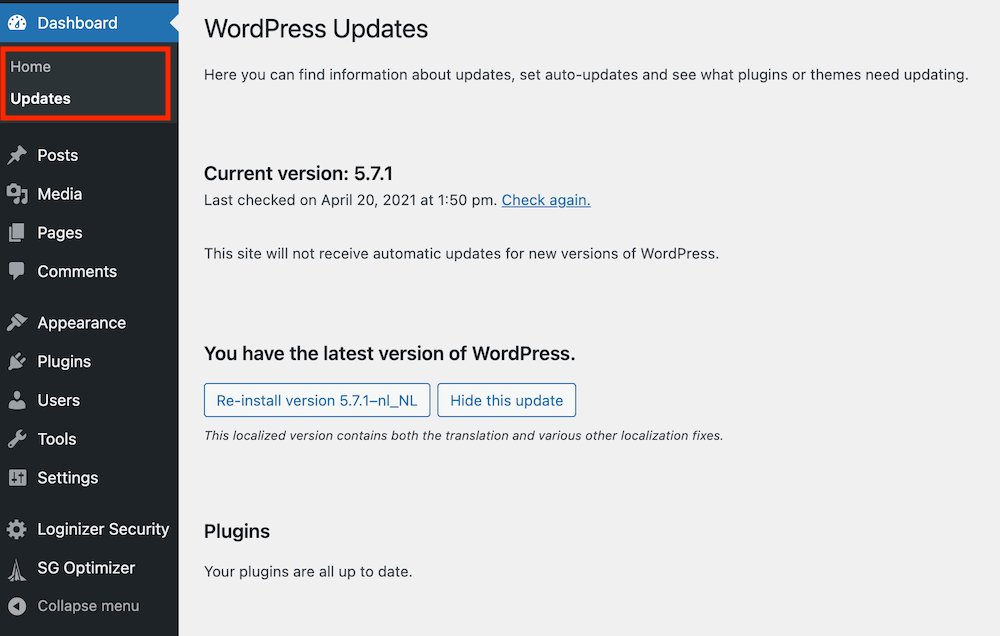
In this section of the WordPress dashboard, you can automatically see which aspects of your WordPress site need updating. You can do this with just a single click.
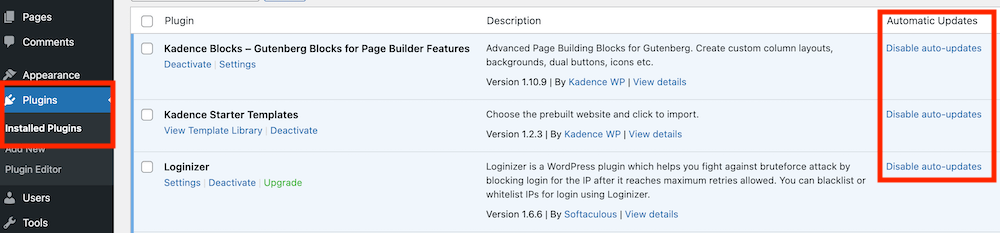
Keeping plugins updated
To update your plugins, go to Plugins » Installed Plugins. When a plugin is out of date, you'll see this under the Automatic Updates section. Here you can also choose to enable automatic updates (with some web hosts, including SiteGround). I personally do this for all my plugins across all my sites.
However, there's always a (very small) chance that a new version of a plugin could break part of your site. If you're concerned about this, don't enable this option, and make sure to update your plugins manually. Always create a backup of your site before installing new versions of your plugins.
Images for your website
Images make your website more vibrant and interesting for your visitors. You can use your own photos, but this isn't always practical. Sometimes you naturally want to display something that you can't easily capture on camera yourself.
Keep in mind that you can't simply grab the first image you find on Google, as most of these images are protected by copyright.
Fortunately, there are several sites that offer beautiful copyright-free images and videos at no cost. Here are my favorites:
- Freepik (for photos and vector images)
- Pexels (for photos and videos)
- Pixabay (for photos)
- AllTheFreeStock (for everything under the sun, including sound effects)
Keep in mind that if you don't have a paid membership on these sites, in many cases you'll need to include attribution or credit the source.
Google Analytics and Google Search Console
Google Analytics is a free web analytics tool that allows you to track and analyze your website traffic. You can add Google Analytics to your site using a code snippet, but it's much easier to use a plugin for this purpose. The Rank Math plugin we discussed above lets you automatically add Google Analytics to your website.
Google Search Console reports how much organic traffic your website attracts, provides an overview of your performance, and lets you fix website issues. This Google guide explains exactly how to set up Google Search Console.
Google Analytics and Google Search Console are both extremely important tools for every webmaster.
Logo for your website
There are also a few fantastic services that let you quickly and easily create a logo for your site. Below you'll find my favorite options.
Free Logo Design
With FreeLogo Design, you can create an excellent logo in just minutes. Simply enter your site name, choose the type of logo you're looking for, and you'll be able to select from a wide range of logo options. In just a few clicks, you can customize your logo's colors and make other adjustments.
This gives you a somewhat generic logo, but if you're just starting out, it's more than adequate.
Use 99Designs for professional logo design
If you want a unique, professional logo for your website (and/or business), I recommend using 99Designs.
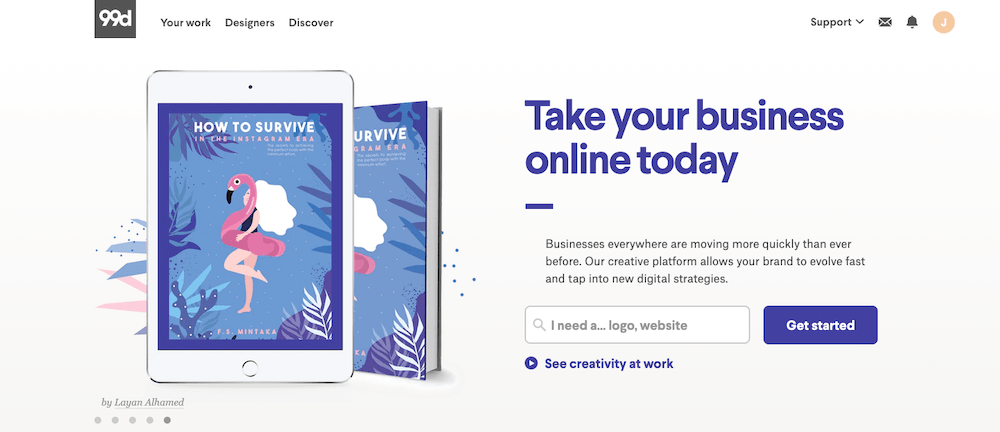
99Designs is a platform for graphic designers. You can directly contact a designer who appeals to you, or you can set up a design contest. I've personally used both options and am extremely satisfied with the designs that resulted from them.
SEO: making sure people find your website
Once your website is live, you'll naturally want people to be able to find it through Google. For this to happen, you need to understand the basics of SEO (Search Engine Optimization).
There's an abundance of information available about SEO. Quite a lot of this information contradicts itself. This makes it challenging for beginners to find their way in this world.
Regarding SEO, I follow these basic principles:
- I don't believe in SEO tricks and focus first and foremost on adding value for my visitors.
- What works for one website or niche doesn't necessarily work for another website or niche. Regardless of what I read about SEO, I never take anything as gospel and view everything with a critical eye.
The first rule ensures your website will continue to receive long-term visitors from Google. The second rule keeps my SEO strategy focused and makes sure I always think carefully about the “why” behind implementing my SEO activities.
I believe that the following SEO strategy works best at its core for most websites:
- Having your on-page SEO 1.0 completely optimized down to the last detail
- Creating truly excellent content that aligns with user search intent
- Making relevant individuals and highly-visited websites aware of this content in order to gather strong backlinks
Copywriting: your text can make the difference between making a sale and walking away empty-handed
Writing effective content for your website is a specialized skill. It's a critical ability for your site's success: with ineffective copywriting, you'll struggle to generate sales. That's why it's smart to invest in quality copywriting.
Copywriting can be defined as follows:
Copywriting is the art of crafting persuasive text that inspires readers to take action. This could be making a purchase, providing an email address, donating money, or clicking a button. You'll find copywriting on sales pages, advertisements, blog articles, and social media posts.
Website design
If you're using one of the Kadence starter templates or another ready-made WordPress theme for your website, you won't need to worry much about website design.
However, if you're planning to design and build your own pages or even an entire website from scratch, understanding the basic principles of web design is essential.
Website design is extremely important for your site's success. People make judgments about your website in just 50 milliseconds. Often, this is enough time for them to decide whether they'll read your webpage or click back to the search results.
Fortunately, all well-designed websites follow a set of universal principles that you can master fairly quickly.
Conclusion
Congratulations on completing this guide! Being able to create a WordPress website yourself is an incredibly valuable skill. I'm sure you'll find it very useful.
The beauty of the process explained here is that you can do it all yourself without having to hire anyone. Creating your own website with WordPress is by far the most budget-friendly way to get a website up and running.